


Sunshine of Hope. No-Line Watercolour Sunflower.
Hello friends,
Monica here again! I must confess, I had been looking forward to the opportunity to create a project with this lovely stamp set. This Sunshine of Hope stamp set is not only beautiful but very meaningful and I especially love the sentiments.
I thought it was the perfect image to use with one of my favourite techniques: no-line watercoloring.

I started by stamping the image using Antique Linen Distress ink in some watercolour friendly cardstock. This time around, I went for Bristol Smooth because it works really well with the markers I was going to use.
I started by stamping the image using Antique Linen Distress ink in some watercolour friendly cardstock. This time around, I went for Bristol Smooth because it works really well with the markers I chose.
I used the following Zig Real Brush markers.
For the petals: 050, 051, 052, 067.
For the stem and leaves: 043, 063, 043, 046.
For the centre of the flower: 063,066, 064.
To add detail to the petals I used the following polychromos colour pencils: 109 and 187.
Once I was done with the colouring, I splattered some white gouache to the finished image to create a more organic look and I set aside to let it dry.
You can refer to this video for details on the no-line watercolour watercolour technique.
Then I die cut the image using the matching Sunshine of Hope die and cut 2 more layers using basic thick cardstock, glued all the pieces together with Studio Katia liquid glue and let it dry

I wanted to give dimension to this card. So I created a layered front panel. For the first one I inked a piece of white cardstock from the centre outwards with a few shades of yellow and orange. Creating a saturated area in the centre of the cardstock and trimmed it to 4 X 5 ¼ “. For the second layer, I used the Dotted Slimline die set 3, I placed it at the edge of the cardstock (this left one side of the cardstock free), ran it through the die cutting machine, then slid it to the other side, and ran it again. This left me with the full width of the cardstock with the dotted pattern. I then trimmed it to 3 ¾ X 5” and inked the edges with a little leftover ink from the same brush I had previously used.
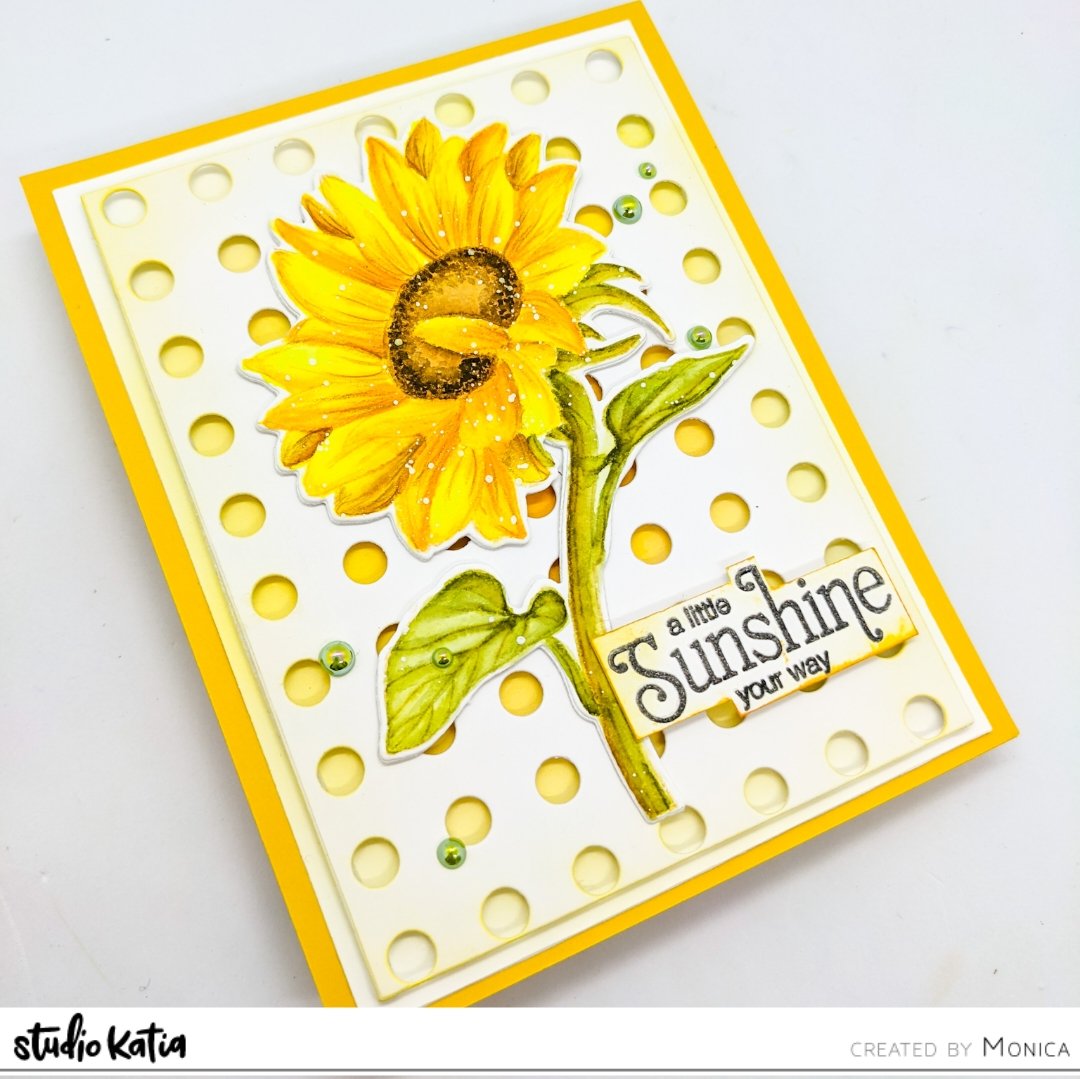
I used a sentiment from the Sunshine of Hope stamp set, stamped it on a piece of thick white cardstock, added gold embossing powder and heat set it. I then cut the sentiment using an exacto knife and also distressed the edges a bit with some yellow ink.
To assemble the card, I created a card base of a yellow cardstock. I adhered the first part of the front panel with liquid glue and then the second one using foam tape. I glued the Sunflower right at the centre and placed the sentiment in the bottom corner.
I wanted all the attention to the actual Sunflower but still added a few Moss Green pearls, which gave a nice contrast to the yellow.
I made this video that is all about how I put this card together (without the colouring).
Working on this project was a joy, especially the colouring which was super relaxing. I hope you like it and don’t hesitate to leave a comment if you would like more details.
See you next time!!
“The whole difference between construction and creation is exactly this: that a thing constructed can only be loved after is constructed; but a thing created is loved before it exists. As the mother can love the unborn child.”


