


Fun with Alcohol Markers on Vellum
Hello everyone, thanks so much for being here.
Question, have you tried your alcohol markers on a vellum yet? Just like you will use the alcohol inks but instead of using the liquid with the dropper, you will be using your makers to scribble, add spots here and there or however you want to apply the colour, really there are no rules.
If you like a more visual description, take a look at this short video.
I started with a piece of thick vellum and used my alcohol markers to scribble on it without really any particular order. Then, using a large dropper, I sprinkled some alcohol and moved the piece of paper in all directions so the colours could mix. I used the heating tool to speed up the drying process which also happens to enhance the colours.
For this first card, I wanted to maintain most of the panel. After all, that was the whole point of trying out this technique. So I used a sheet of double sided tape to cover the entire panel, leaving the backing on. I ran the panel on a stitched frame die, then peeled off the backing and adhered it to an A2 card base.
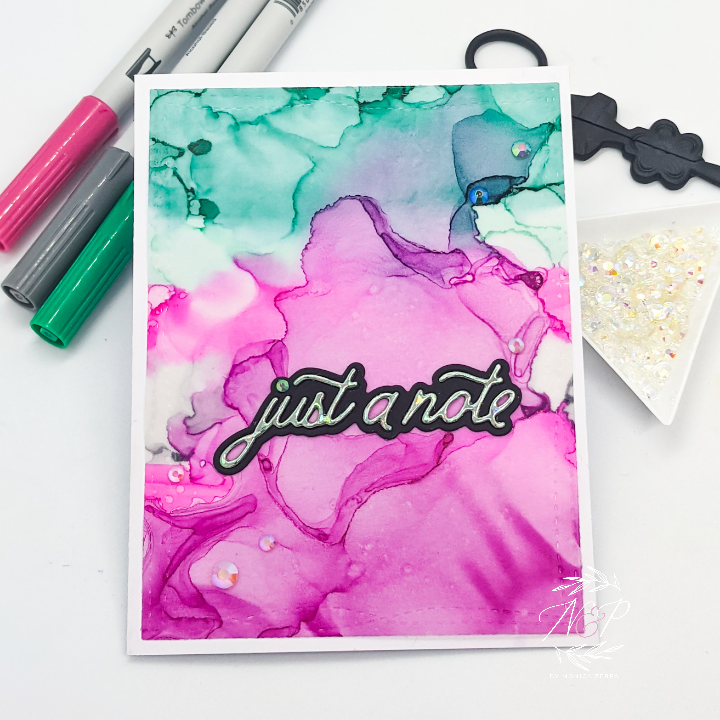
I cut the sentiment from a piece of black cardstock and from a mirror finish cardstock, used the black one as a background and added the shimmer one on top, this also helped to give more dimension.
I finished the card with a few crystals for shimmer since the rest of the design was completely matte.

I liked this technique so much that I went ahead and made another panel using different colours. This time I decided to do something a bit more daring and I ran it through a cover plate die that has almost like a chevron pattern. From it, I was left with a whole bunch of stripes and other larger pieces. I decided to use all of them, first by adding only the V shape pieces and some of the thicker stripes on one card base and the left over pieces (the thinner ones) for the other card.
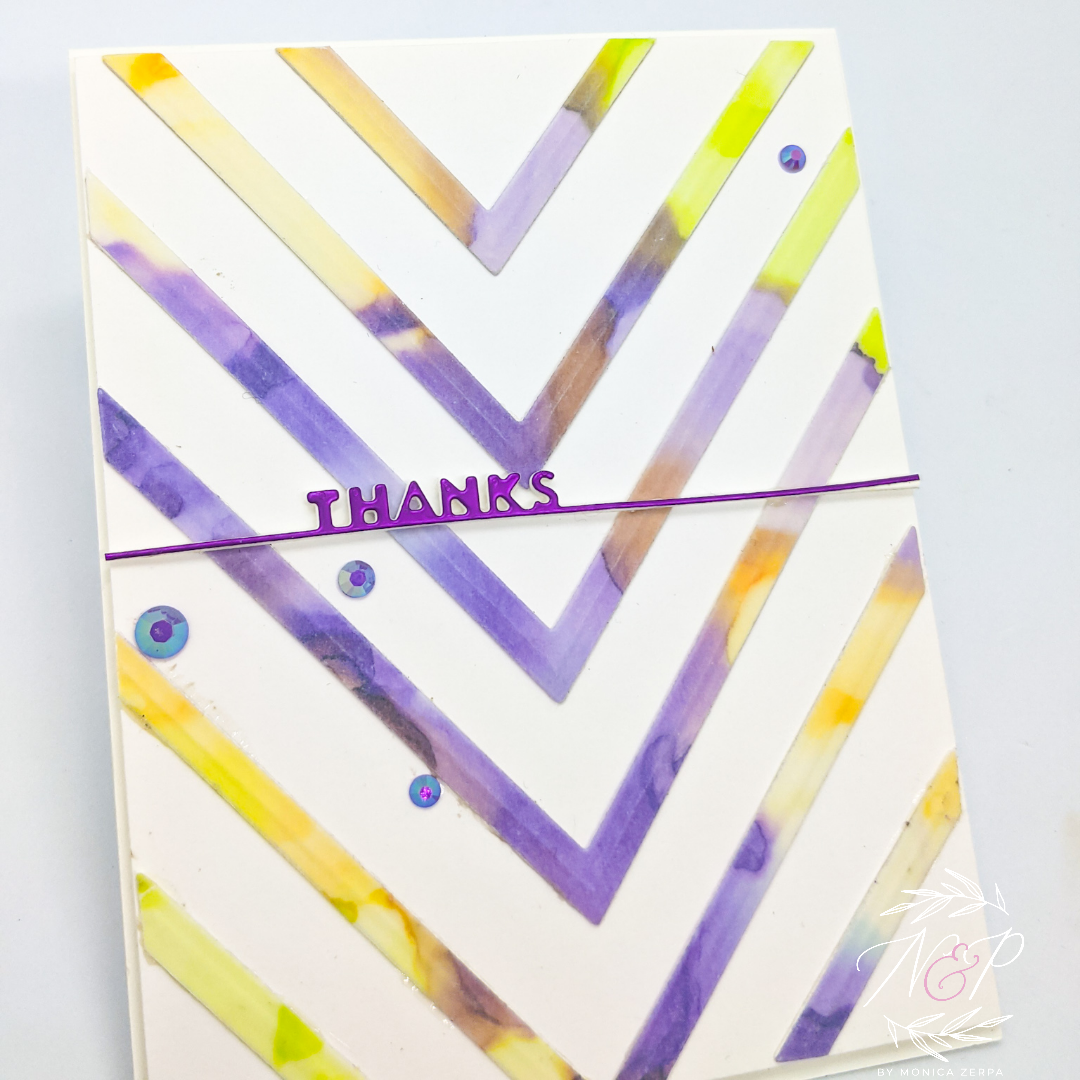
Here I show a quick video of the process and the 2 last pictures are the cards I made for Thanksgiving for my daughters’ teachers, also using the same technique.


One more time, thank you for visiting. Don’t forget to leave a comment if you’d like more details. See you next time.
“Our perfection does not consist of doing extraordinary things but to do the ordinary well”


